Your help center is always
out of date.
Your screenshots are from 3 versions ago. Your FAQ says "click the blue button" but it's green now.
flowatlas fixes this. Automatically.
See how flowatlas builds your help center from code
From repo to docs in minutes
No CLI, no complex setup—just connect and go.
Connect GitHub
One click to install our GitHub App and select which repos to document.
We analyze
Scan routes, components, and user flows automatically—no config needed.
Generate docs
FAQ pages, step-by-step guides, and screenshots created in minutes.
Stay in sync
Auto-updates on every push to main. Your docs never go stale.
Every release, you have a choice
Spend hours updating your help center manually, or let flowatlas handle it in minutes.
- Retake screenshots after every UI change
- Rewrite guides when workflows change
- Audit every page for stale content
- Field tickets about outdated docs
- Push your code to GitHub
- We detect changes automatically
- Fresh screenshots, fresh guides
- Export to your help center, done
How it works
Connect once. Keep your help center updated forever.
Automatic screenshots
We capture pixel-perfect screenshots of every UI state. Fixed viewports, mocked data, deterministic results—no more flaky captures.
Always in sync
Runs on every push to main. Your docs stay current without lifting a finger.
Smart detection
We analyze your routes, components, and user flows. No manual mapping required.
Export anywhere
Push directly to your help center or download as portable Markdown. Works with all major platforms.
See what we generate
A real step-by-step guide generated from a healthcare EHR codebase.
How do I schedule a patient appointment?
Schedule appointments for your patients directly from the calendar. You can set the time, duration, and choose between in-person or video sessions.
Start from your Dashboard where you can see upcoming sessions and tasks

Navigate to the Calendar view from the sidebar to see your schedule
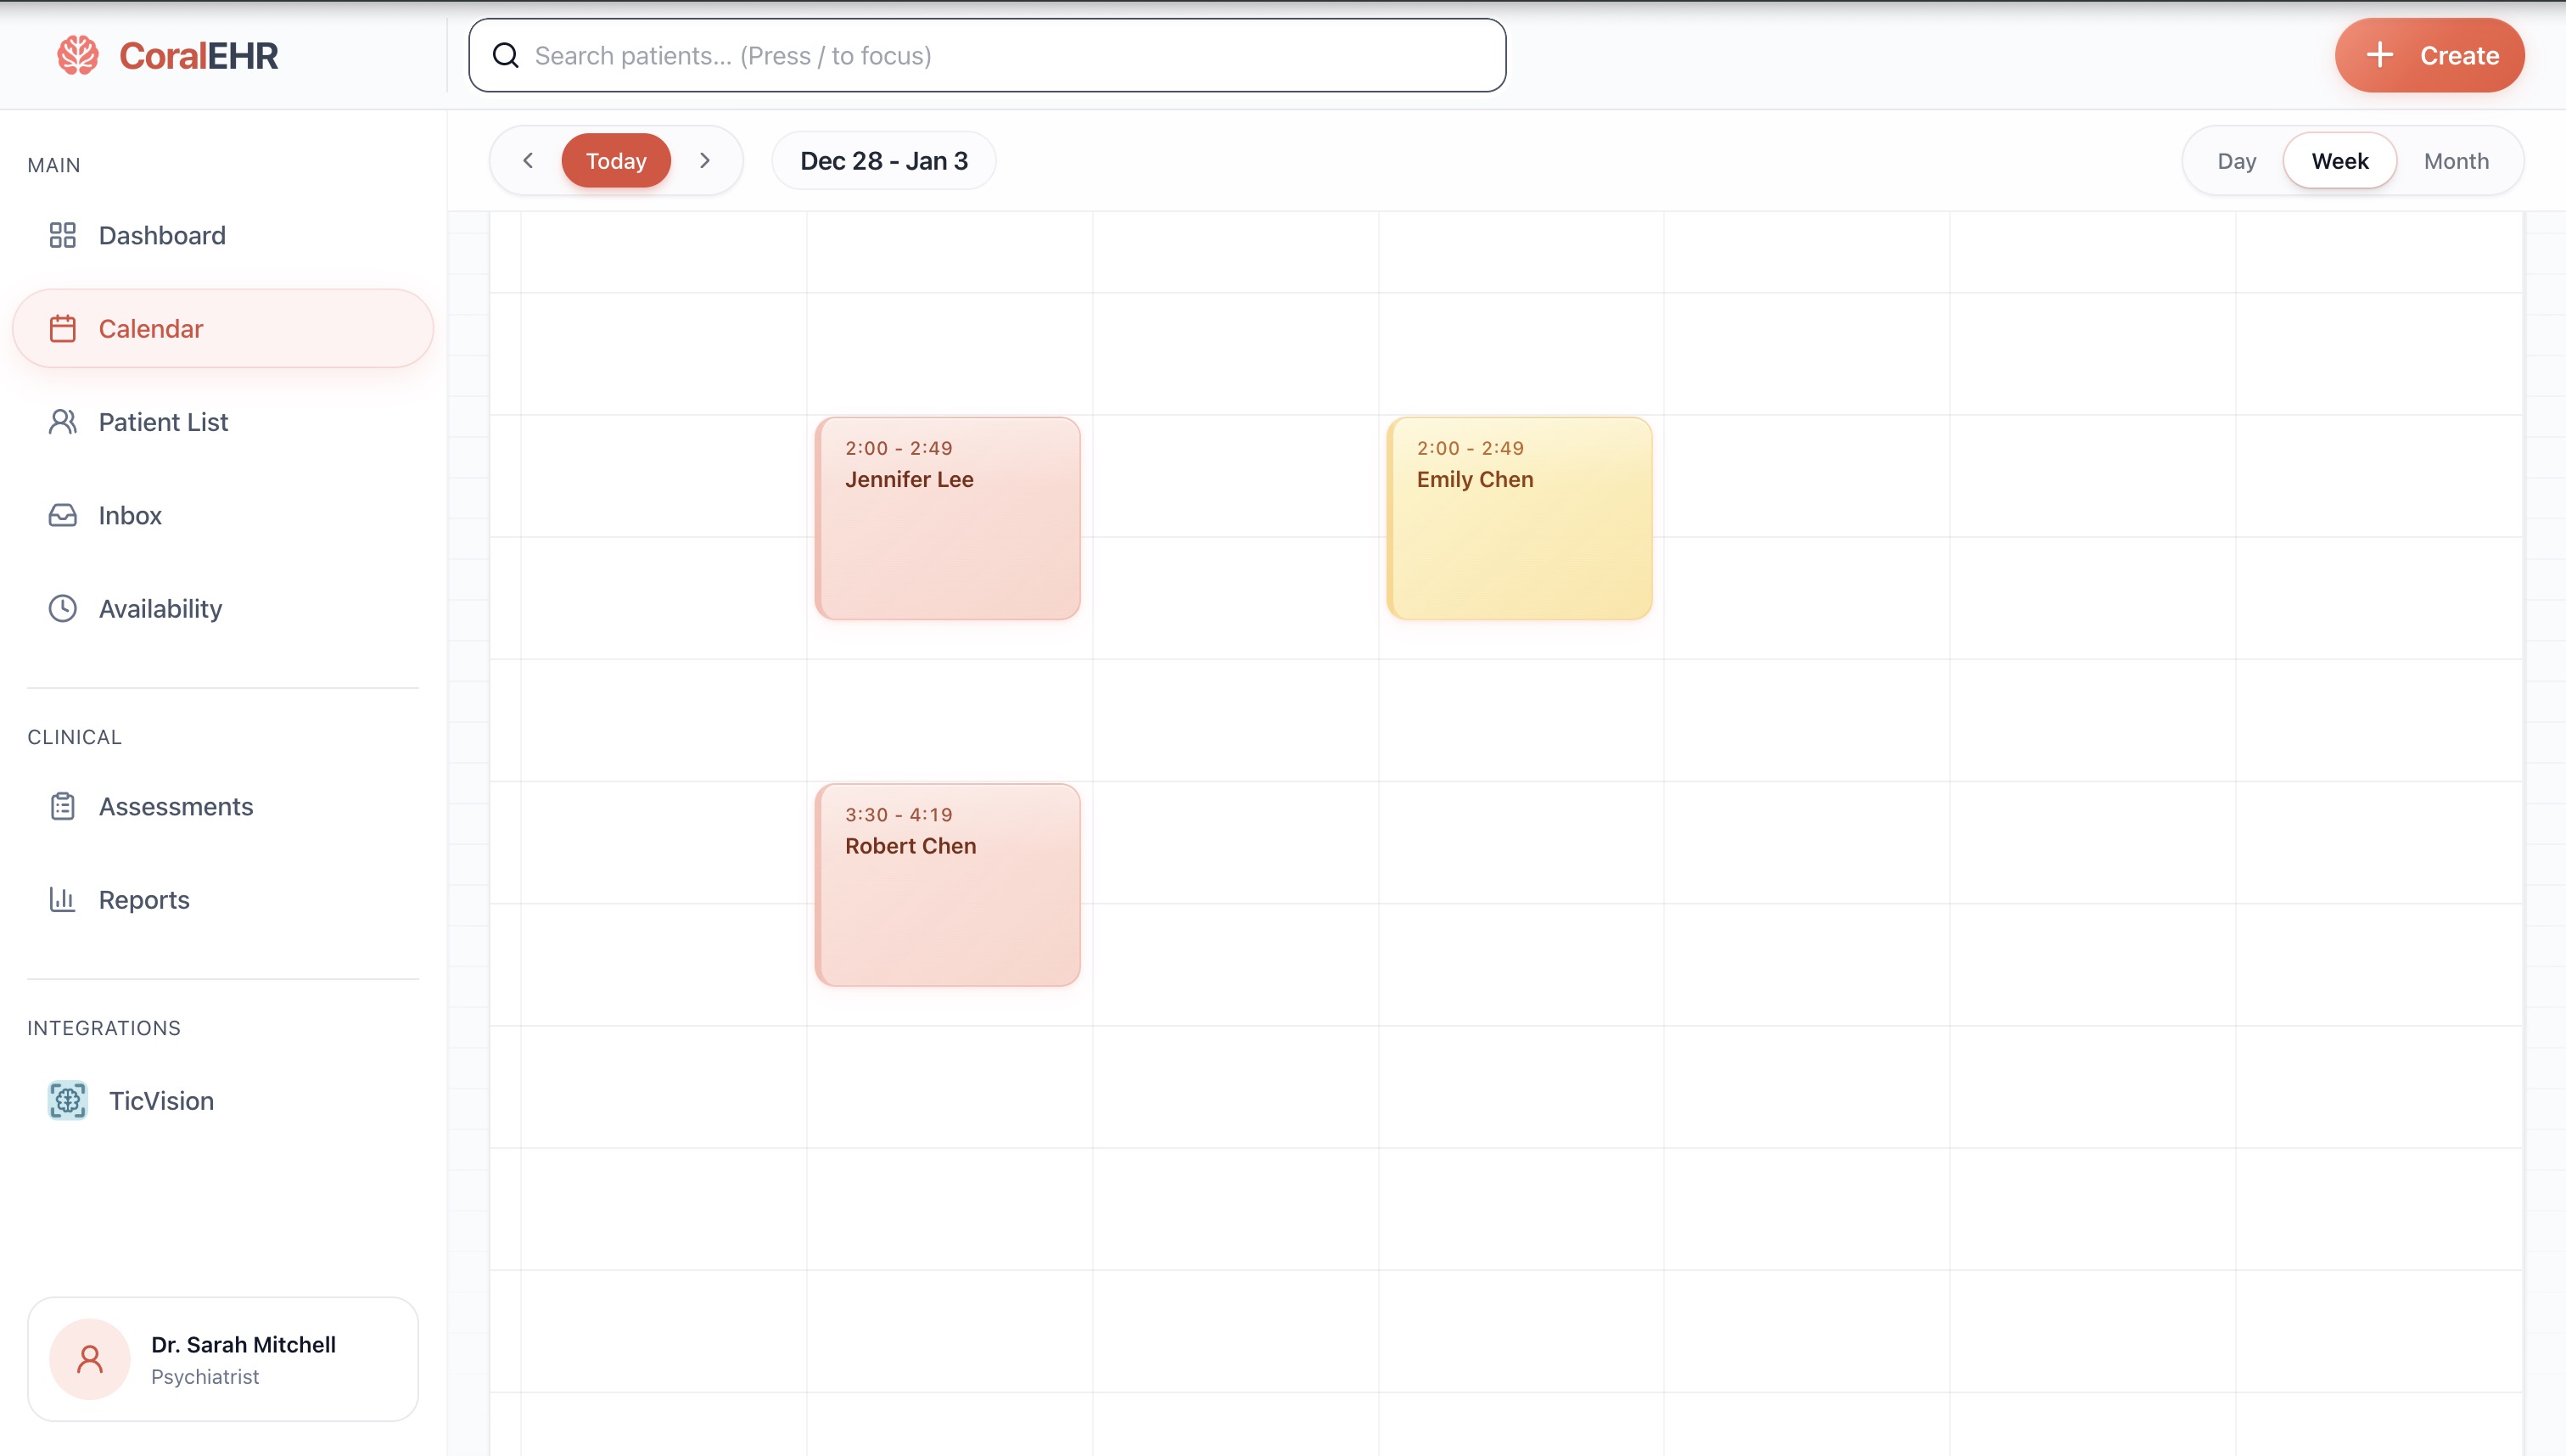
Click and drag on an empty time slot to create a new appointment block
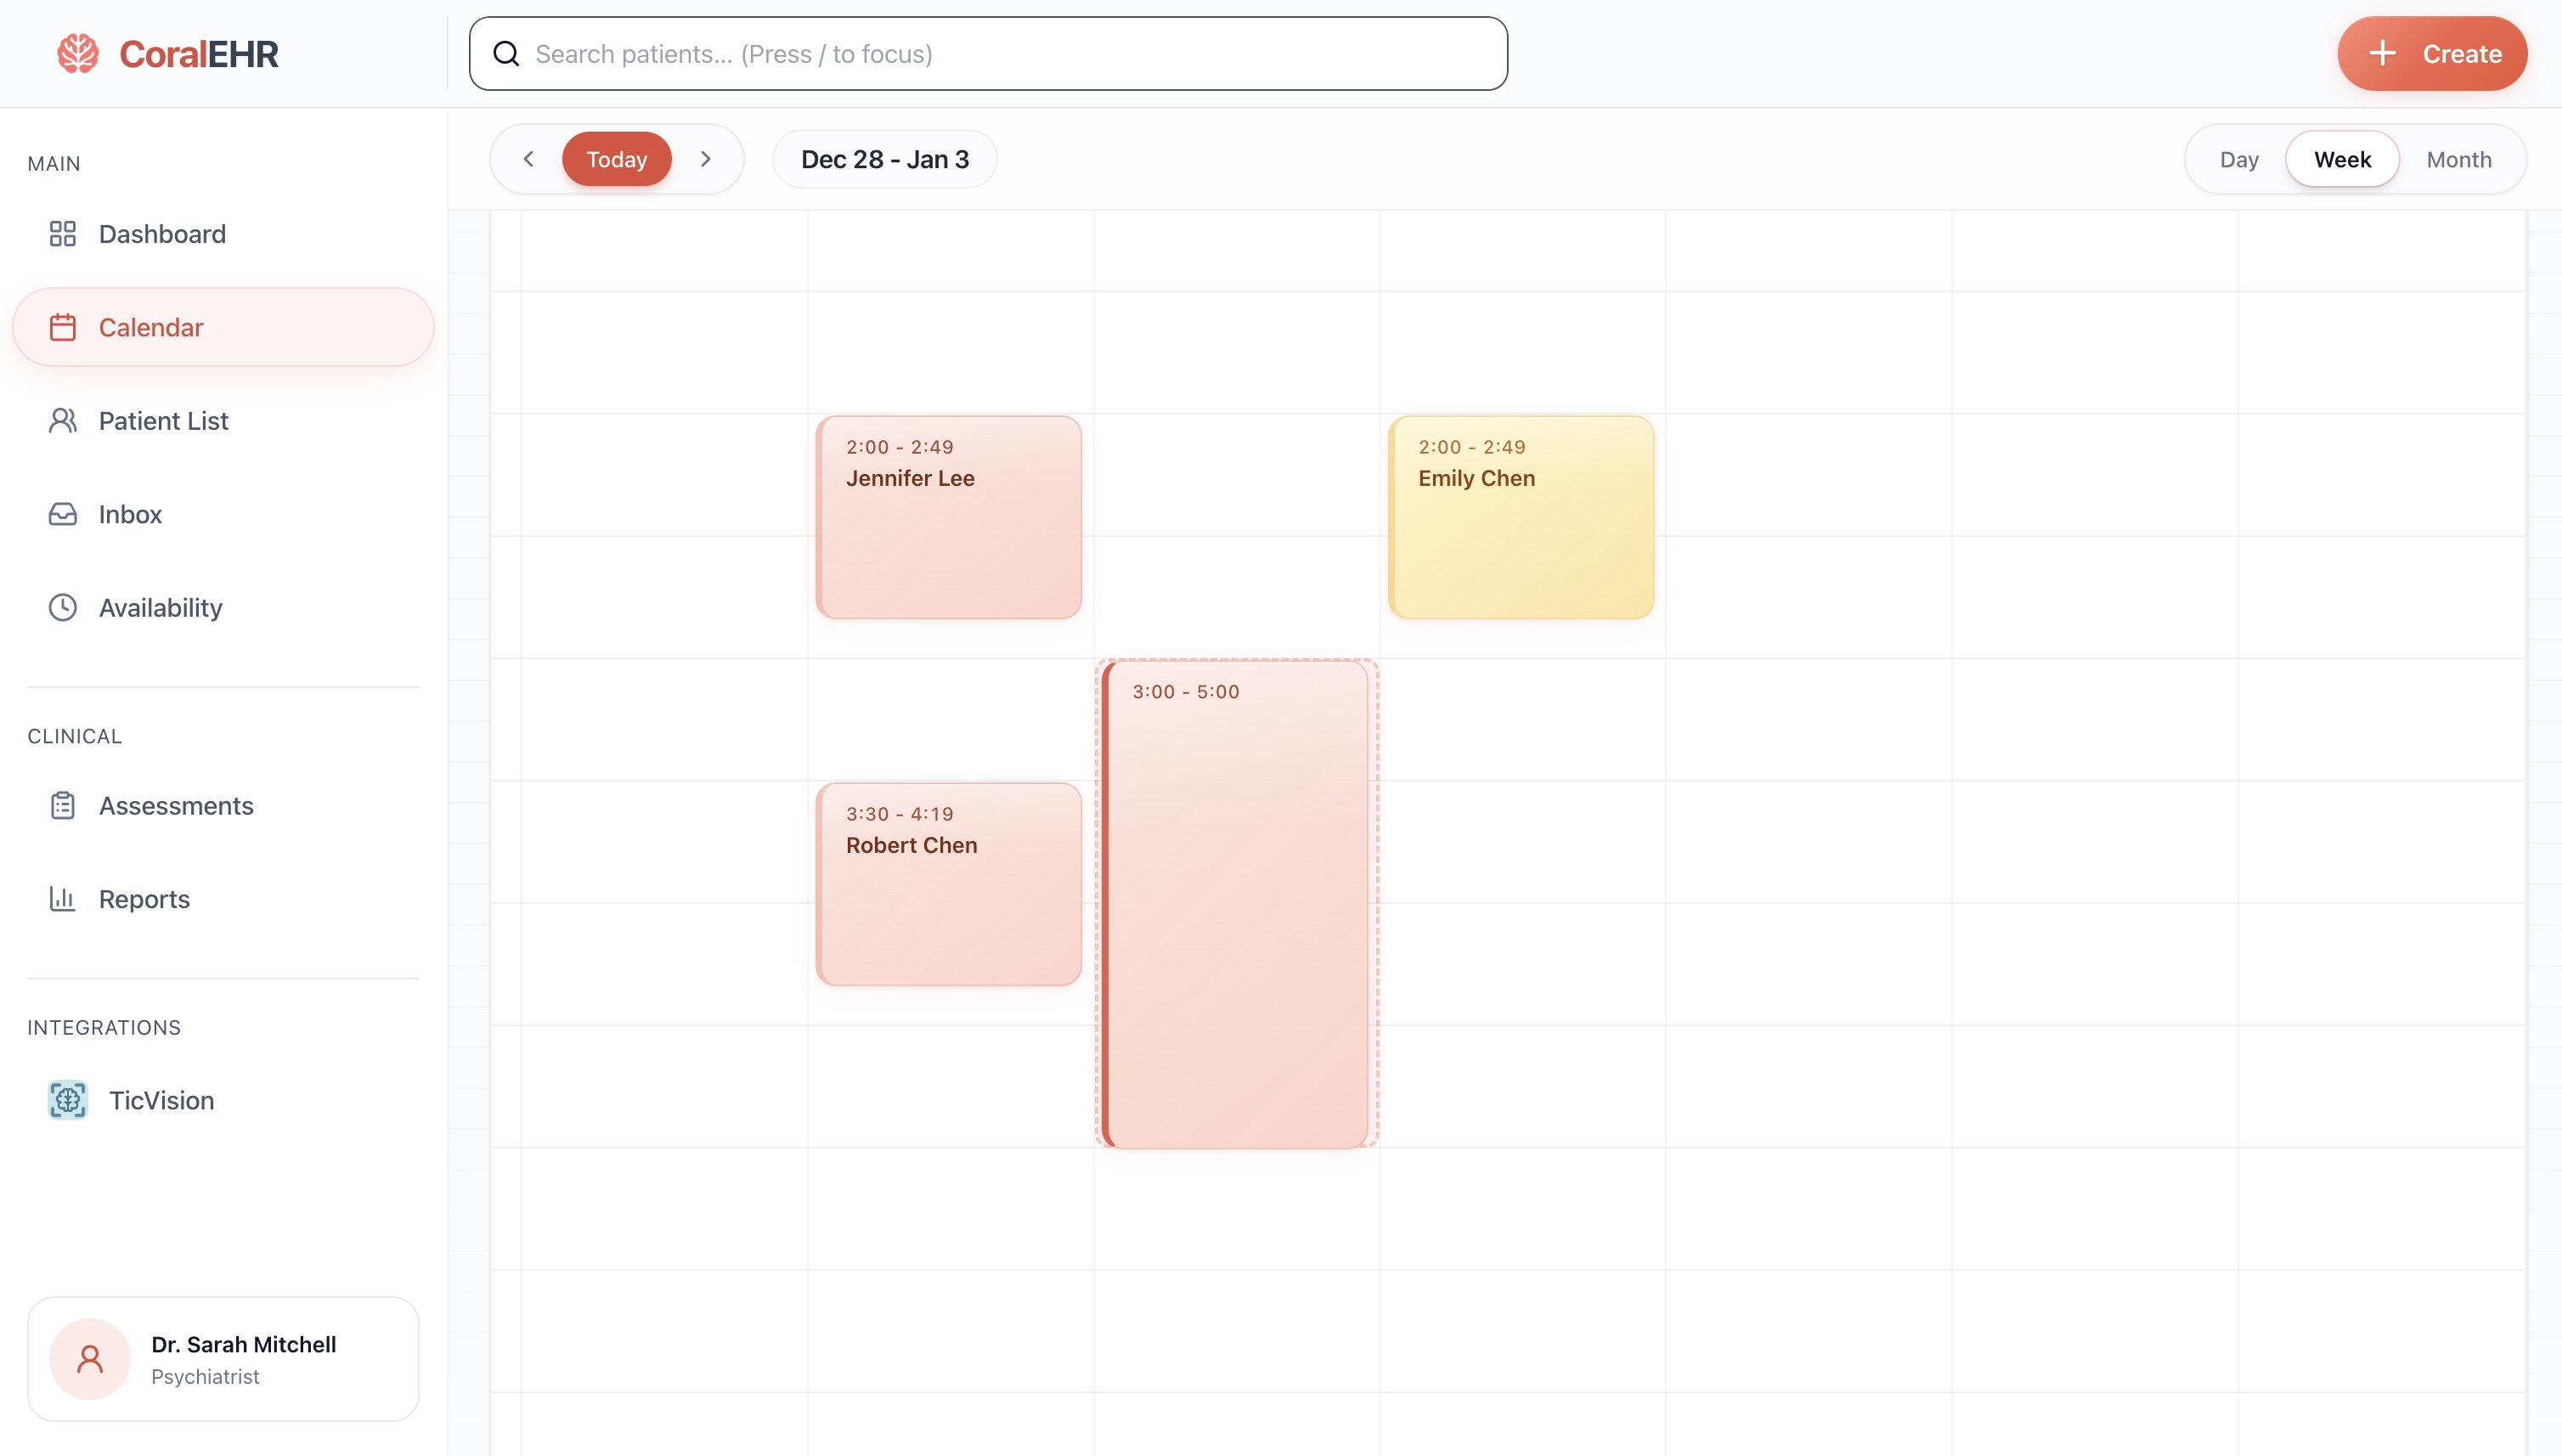
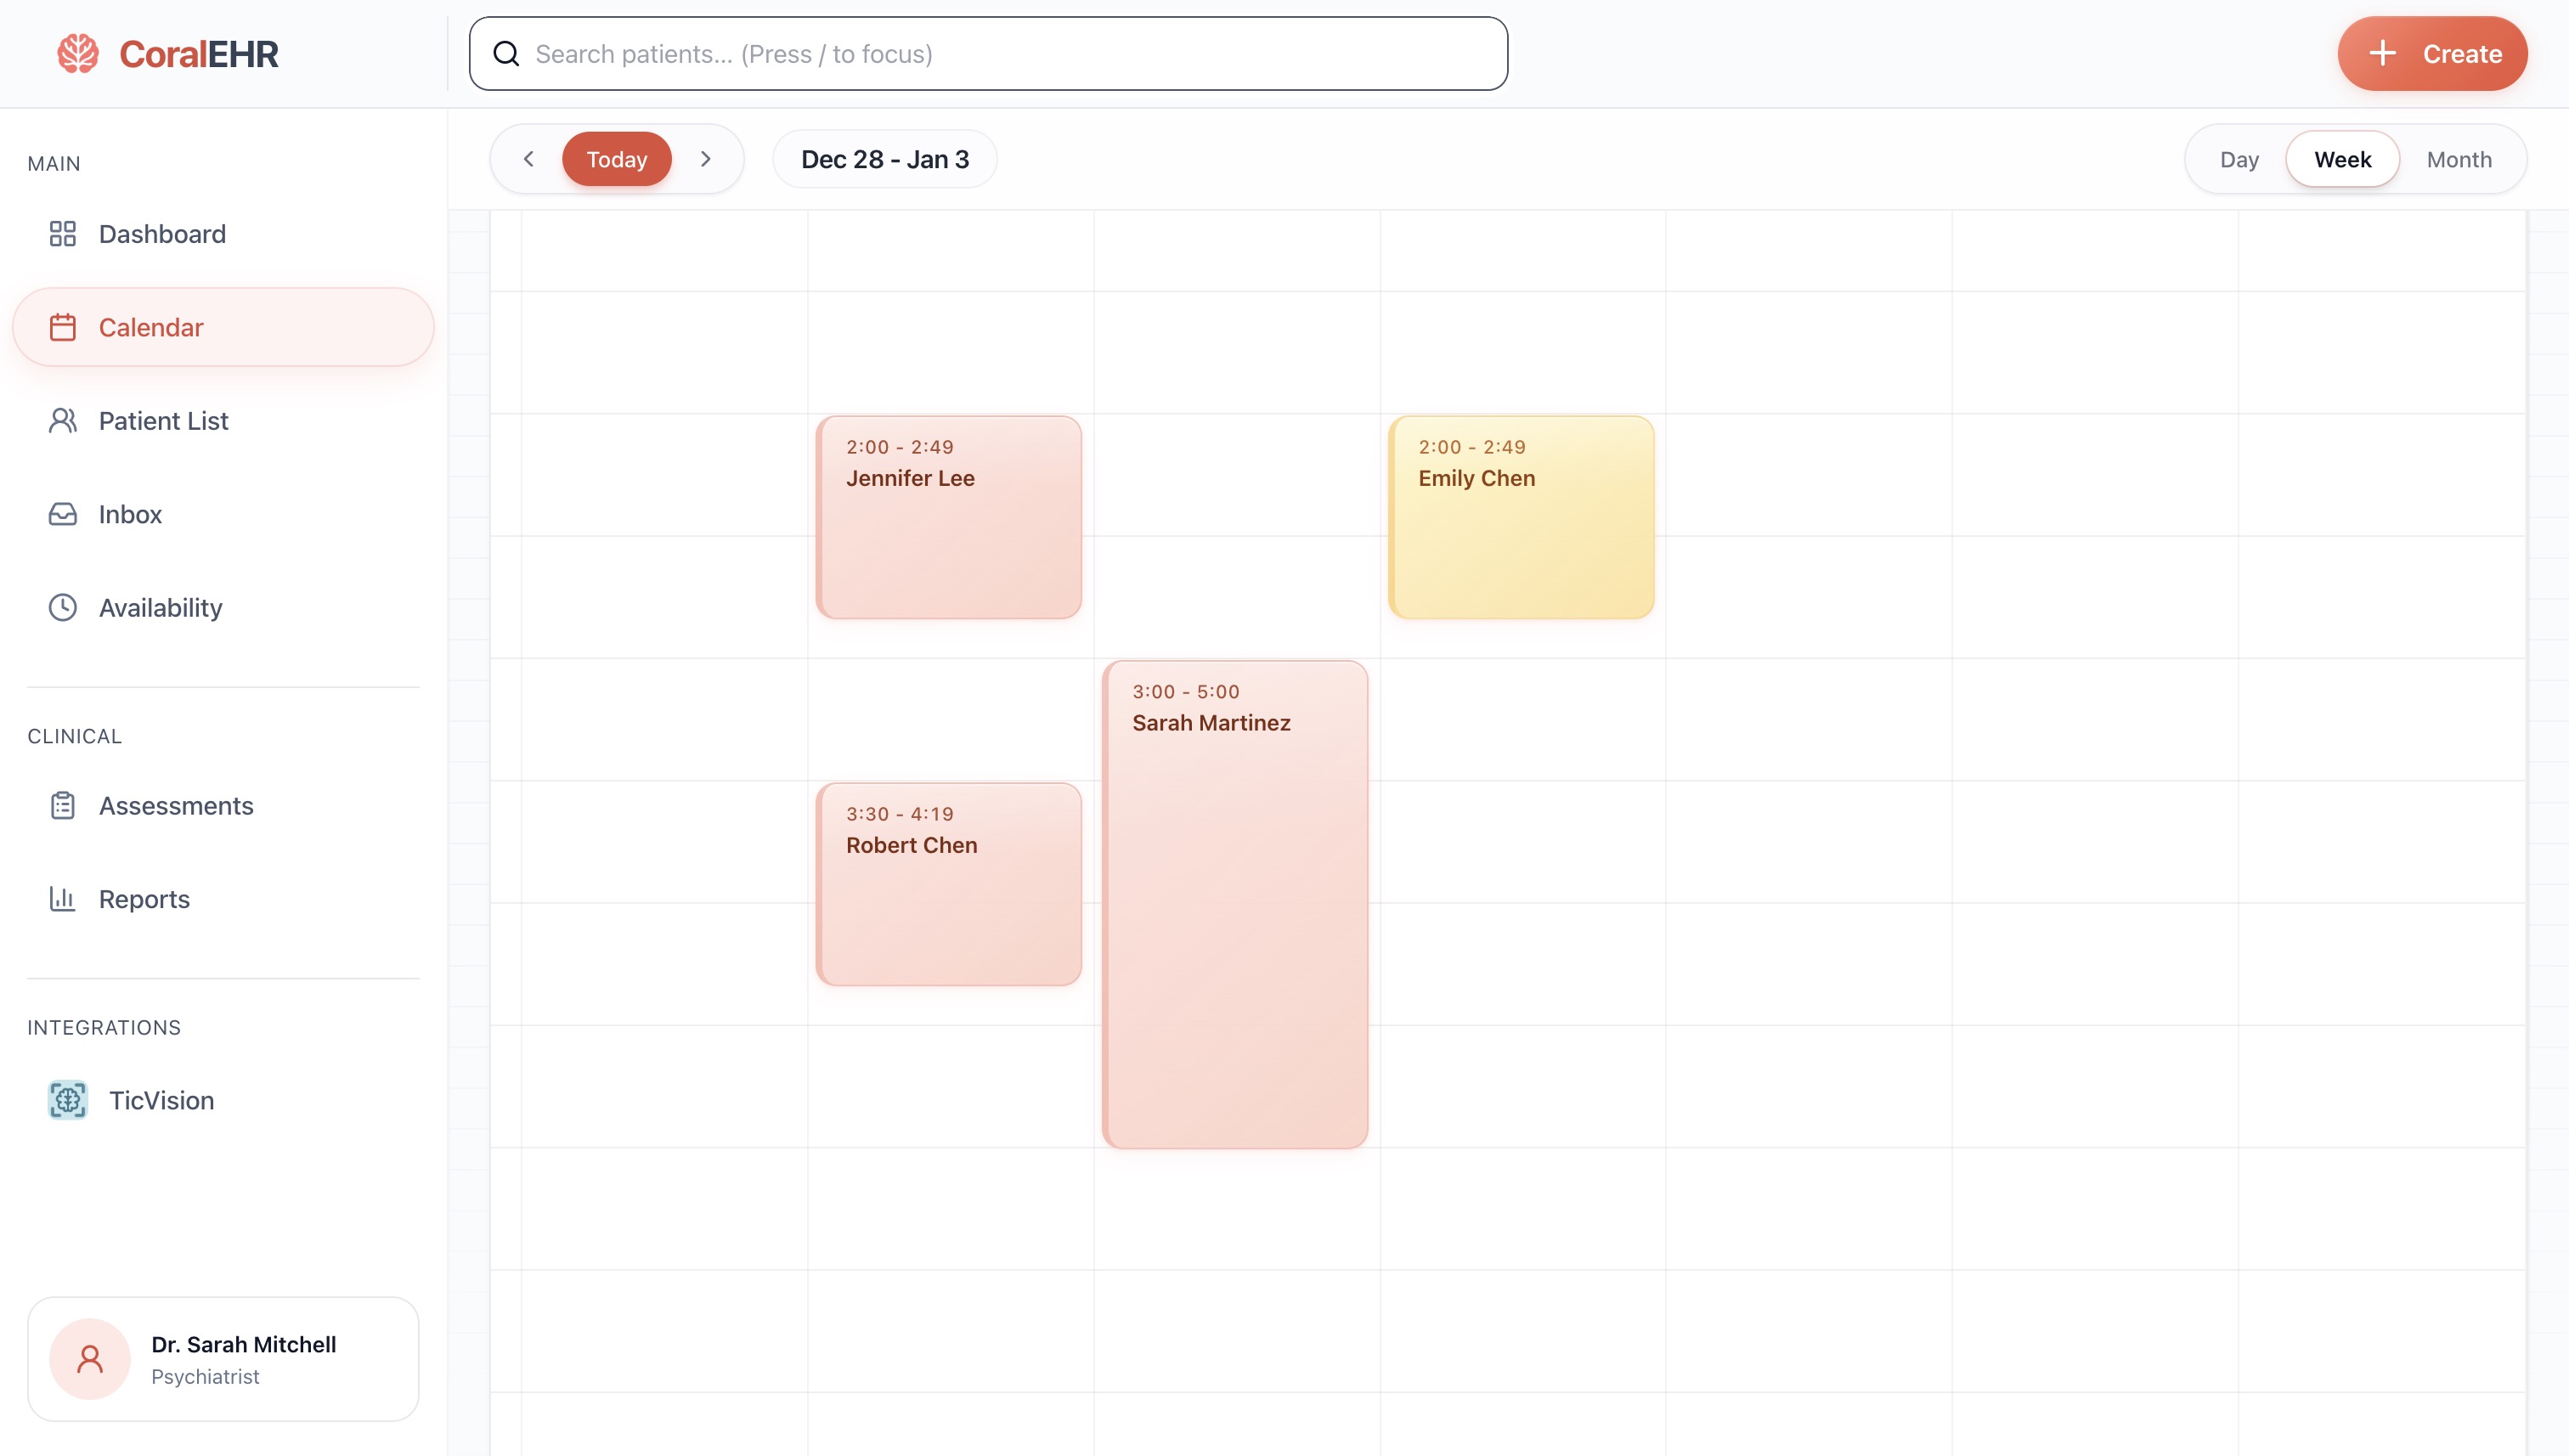
Fill in the appointment details: select a patient, set the time, and choose In-Person or Video

Your new appointment now appears on the calendar - you're all set!
Troubleshooting
"Time slot unavailable" error
This time slot may conflict with another appointment or fall outside your availability hours. Check your Availability settings or choose a different time.
Manage availability settings →e8f2a1d
Source: src/components/Calendar.tsx:156 Stop updating your help center by hand.
Join the waitlist and be first to know when we launch. Early access members get priority onboarding.